Introduction
If you’re looking to access Google Analytics data programmatically, whether to build custom dashboards, automate reporting, or integrate analytics into your own applications, you’ll need an API key. Google provides a powerful Analytics API through the Google Cloud Platform (GCP), but getting started can be a bit technical.
This step-by-step guide simplifies the entire process, walking you through everything from setting up a GCP account to securing your API key and integrating it into your application. Whether you’re a developer, marketer, or data analyst, this guide will help you unlock the full potential of Google Analytics data using the API.
STEP 1: Create a Google Cloud Platform (GCP) Account
Before you can obtain an API key for Google Analytics, you need to have a Google Cloud Platform (GCP) account. This account will allow you to manage APIs and create credentials.
-
Go to the Google Cloud Platform (GCP) website.
-
Sign in with your Google account.
-
If you don’t have a Google account, create one first.
-
Follow the on-screen prompts to set up your GCP account.
-
Provide billing information if required to complete the setup process.
STEP 2: Create a New Project
-
Once your GCP account is set up, create a new project.
-
This project will house your API credentials and settings.
-
In the GCP Console, click on the project dropdown in the top navigation bar.
-
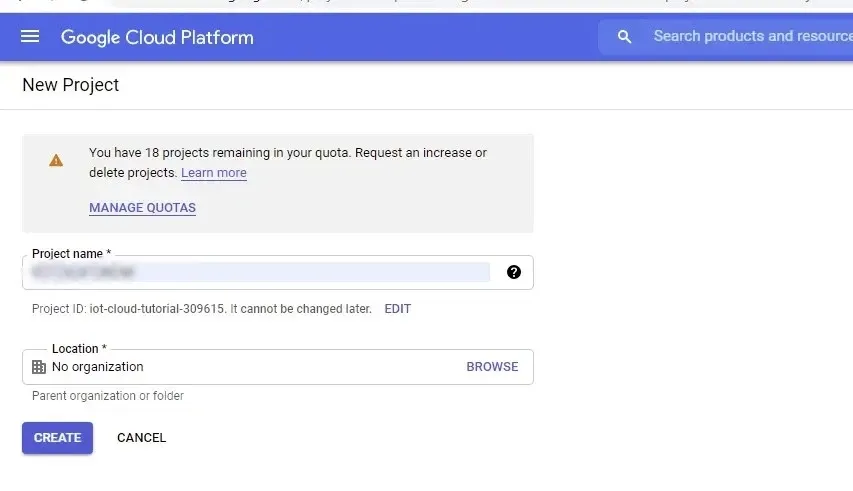
Click on the “New Project” button.
-
Enter a name for your project.
-
Select a billing account if prompted.
-
Click “Create” to set up your new project.
STEP 3: Enable Google Analytics API
-
With your project created, the next step is to enable the Google Analytics API.
-
In the GCP Console, go to the “APIs & Services” section.
-
Click on “Library” in the left-hand menu.
-
Use the search bar to search for “Google Analytics API”.
-
Click on the “Google Analytics API” result.
-
Click the “Enable” button to activate the API for your project.

STEP 4: Create API Credentials
- Now that the Google Analytics API is enabled, create the credentials to access it.
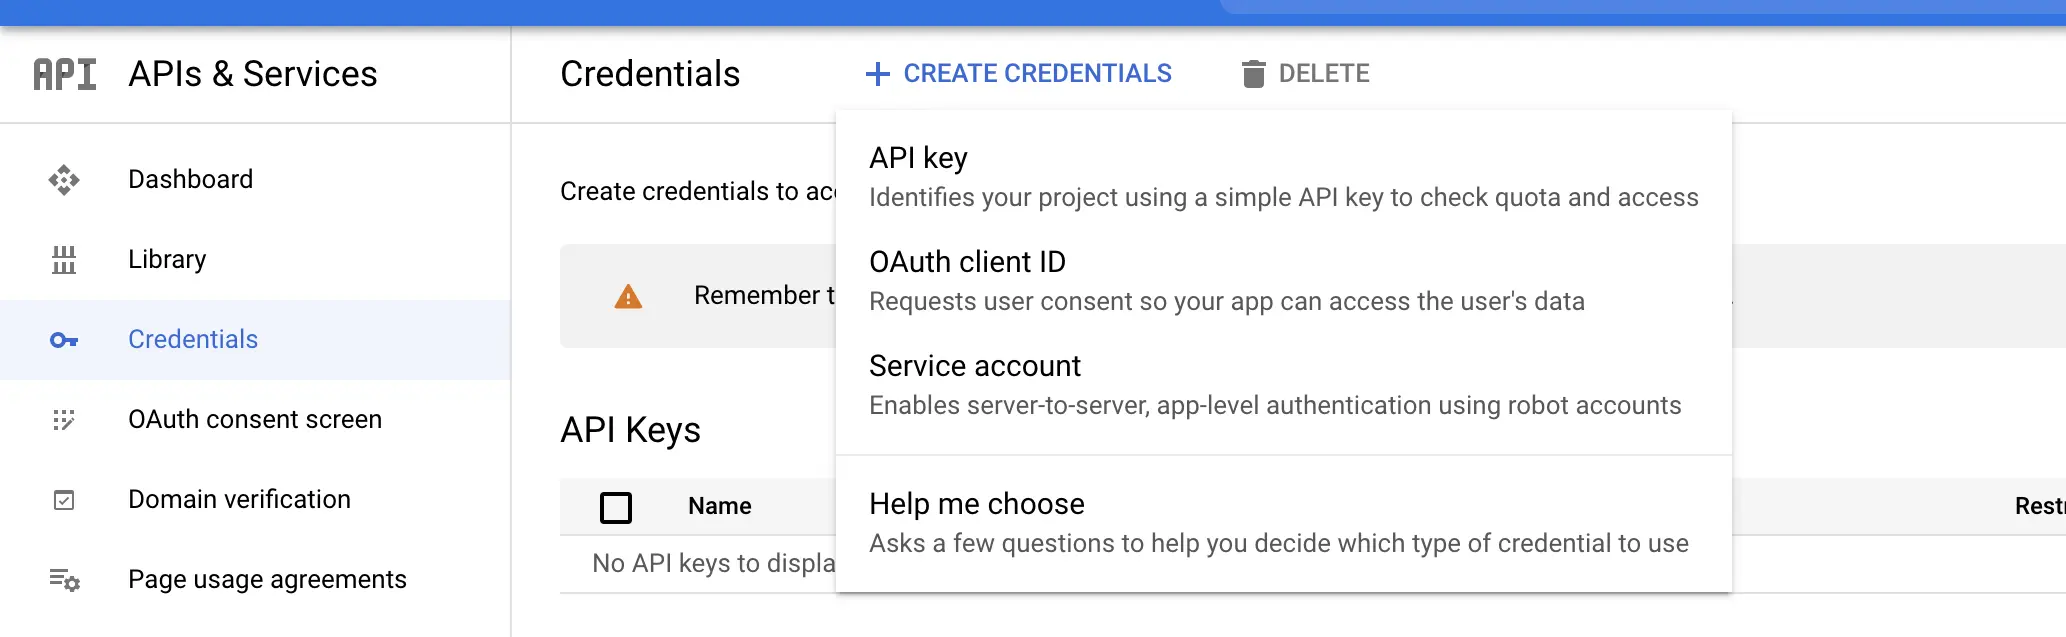
- In the “APIs & Services” section, click on “Credentials” in the left-hand menu.
- Click on the “+ CREATE CREDENTIALS” button.
- Select “API key” from the dropdown.
- An API key will be generated.
- Copy the API key and store it securely for future use.
STEP 5: Restrict Your API Key
For security reasons, it’s crucial to restrict your API key to prevent unauthorized use.
-
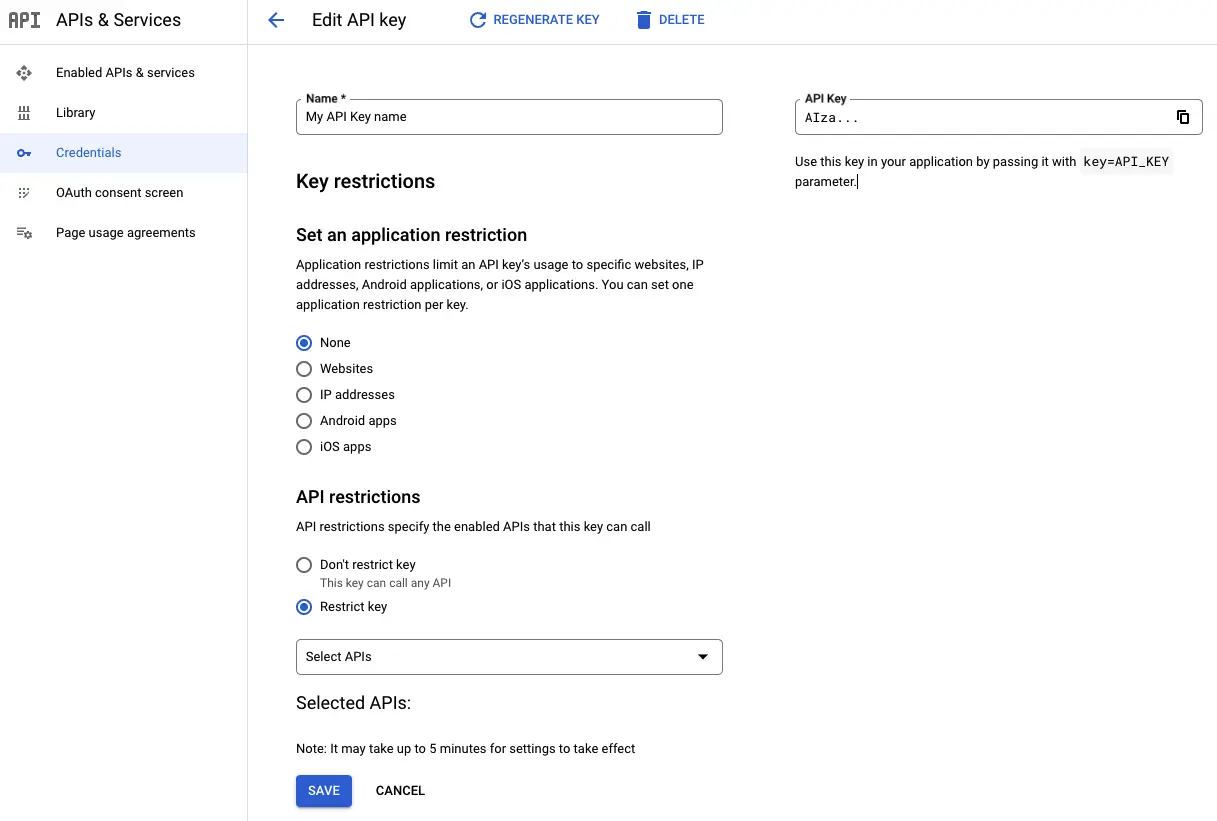
In the “Credentials” section, locate your newly created API key.
-
Click on the pencil icon to edit the key.
-
Under “Key restrictions,” choose either:
-
“HTTP referrers (websites)” – if the key will be used from web domains, or
-
“IP addresses” – if the key will be used from specific servers.
-
-
Specify the allowed websites or IP addresses based on your use case.
-
Click “Save” to apply the restrictions and secure your API key.
STEP 6: Link Google Analytics to Your Project
To use the API key with Google Analytics, you need to link your Google Analytics account to your GCP project.
-
Go to the Google Analytics website and sign in.
-
Navigate to the Admin section by clicking the gear icon at the bottom left.
-
In the “Account” column, select the account you want to link.
-
In the “Property” column, select the property you want to link.
-
Click on “Property Settings”.
-
Find the “Tracking Info” section.
STEP 7: Test Your API Key
Before using the API key in your applications, it’s a good idea to test it.
-
Use a tool like Postman or any API testing tool.
-
Enter the Google Analytics API endpoint URL, e.g.:
-
https://analytics.googleapis.com/v3/data/ga
-
-
Include your API key in the request, either:
-
In the request headers, or
-
As a URL parameter (e.g.,
?key=YOUR_API_KEY)
-
-
Send the request to the API.
-
Verify that you receive a valid response from the API, confirming that the key works correctly.
STEP 8: Integrate the API Key into Your Application
-
With a working API key, you can now integrate it into your application or scripts.
-
Use the appropriate Google Analytics API client library based on your programming language (e.g., Python, JavaScript, etc.).
-
Initialize the API client using your API key.
-
Use the client library to make requests to the Google Analytics API and retrieve data.
-
Process and analyze the data as needed to meet your business requirements.
STEP 9: Monitor and Manage Your API Usage
Regularly monitor your API usage to ensure you stay within the usage limits and to detect any unusual activity.
-
Go to the “APIs & Services” section in the GCP Console.
-
Click on “Dashboard” to view API activity.
-
Review the usage metrics for the Google Analytics API, such as request volume and error rates.
-
Set up alerts to notify you if you’re approaching your usage limits or quotas.
Summary
Obtaining and using a Google Analytics API key doesn’t have to be complicated. By following these nine steps, you can set up your Google Cloud Platform project, enable the necessary API, create secure credentials, and start leveraging your Google Analytics data more efficiently. From testing your key to integrating it into applications and monitoring usage, this guide equips you with the foundation needed to work with the Google Analytics API confidently. With the right setup, you’ll be better positioned to make data driven decisions and build powerful tools around your web analytics.